

Easy social login in Go


In the era of the conversion rate, where a user sign-up is fundamental and must be quick, the social login became a required tile of the UX. Not having this option will probably reduce the registrations, but nowadays enabling this feature is really simple, since every programming language has a lot of libraries that, with few lines of code, create a complete oAuth flow.
In this article we'll explore the case of Go with Gocialite, a Socialite (Laravel) inspired package very simple to use.
The idea of Gocialite is to provide both an easy package but also a hackable one. I was trying Goth, but with Revel, it was very hard to make it working, so why don't write a library more simple? For example, if you want to contribute, you just have to clone a file, change same variable et voilà.
But now, let's coding.
For this example we'll use Gin as router, but you can use as wall whatever you want, like Gorilla/Mux or others.
Starting code and homepage
The first thing is of course to create a new Go project, in this case we'll name it "codelikepro/social". Inside it, there will be only a file named main.go. We'll use terminal, but of course you can create folders and the file manually.
$ mkdir -p $GOPATH/src/github.com/codelikepro/social
$ touch $GOPATH/src/github.com/codelikepro/social/main.go
Now that our file exists, we need to start writing the package name and the necessary imports.
First of all, install gocialite and gin with go get:
$ go get github.com/danilopolani/gocialite
$ go get github.com/gin-gonic/gin
These are the only two external packages we'll use, so we are ready to code. Note I commented fmt and net/http packages because we'll need them later.
Open main.go with our favorite editor and write the following:
package main

import (
    // "fmt"
    // "net/http"

    "github.com/danilopolani/gocialite"
    "github.com/gin-gonic/gin"
)

// Define our gocialite instance
var gocial = gocialite.NewDispatcher()

func main() {

}
At this point in our main function we'll initialize our Gin router and render a homepage with a simple button Sign in with Github.
func main() {
router := gin.Default()
router.GET("/", indexHandler)
// router.GET("/auth/github", redirectHandler)
// router.GET("/auth/github/callback", callbackHandler)
router.Run("127.0.0.1:9090")
}
// Show the homepage
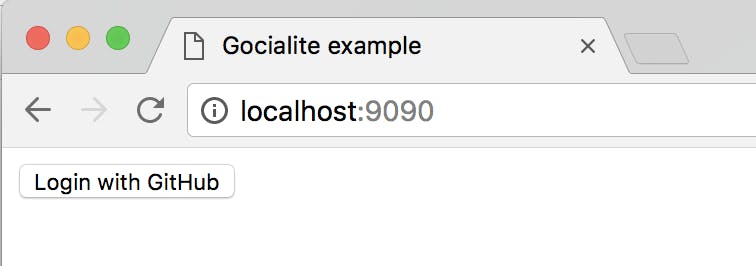
func indexHandler(c *gin.Context) {
c.Writer.Write([]byte("<html><head><title>Gocialite example</title></head><body>" +
"<a href='/auth/github'><button>Login with GitHub</button></a>" +
"</body></html>"))
}
// Redirect user to social login
func redirectHandler() {
}
// Collect user info
func callbackHandler() {
}
With Gin we declared three routes:
A homepage, responding to route /
A redirect bridge at /auth/github. This page will only redirect the user to correct login of the provided driver.
A callback page at /auth/github/callback where we'll collect the user information.
If we test our script running, inside our project folder, go run main.go, we'll just see a button – not working, obviously.
Redirect the user
The next step is to create our bridge, where we retrieve the redirect URL and we send the user to it.
Uncomment the route router.GET("/auth/github", redirectHandler) and let's write the redirectHandler function.
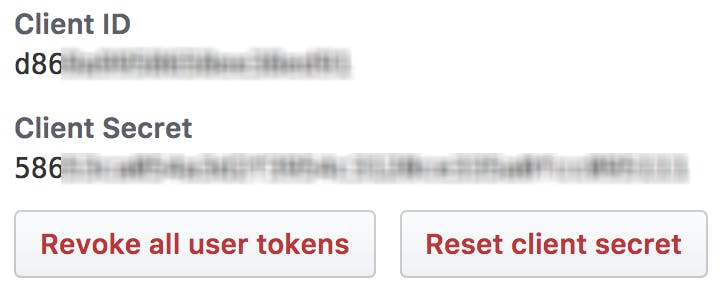
If you don't have a GitHub app, go to New OAuth Application and create a new one. Make sure to use http://localhost:9090/auth/github/callback as Authorization callback URL.
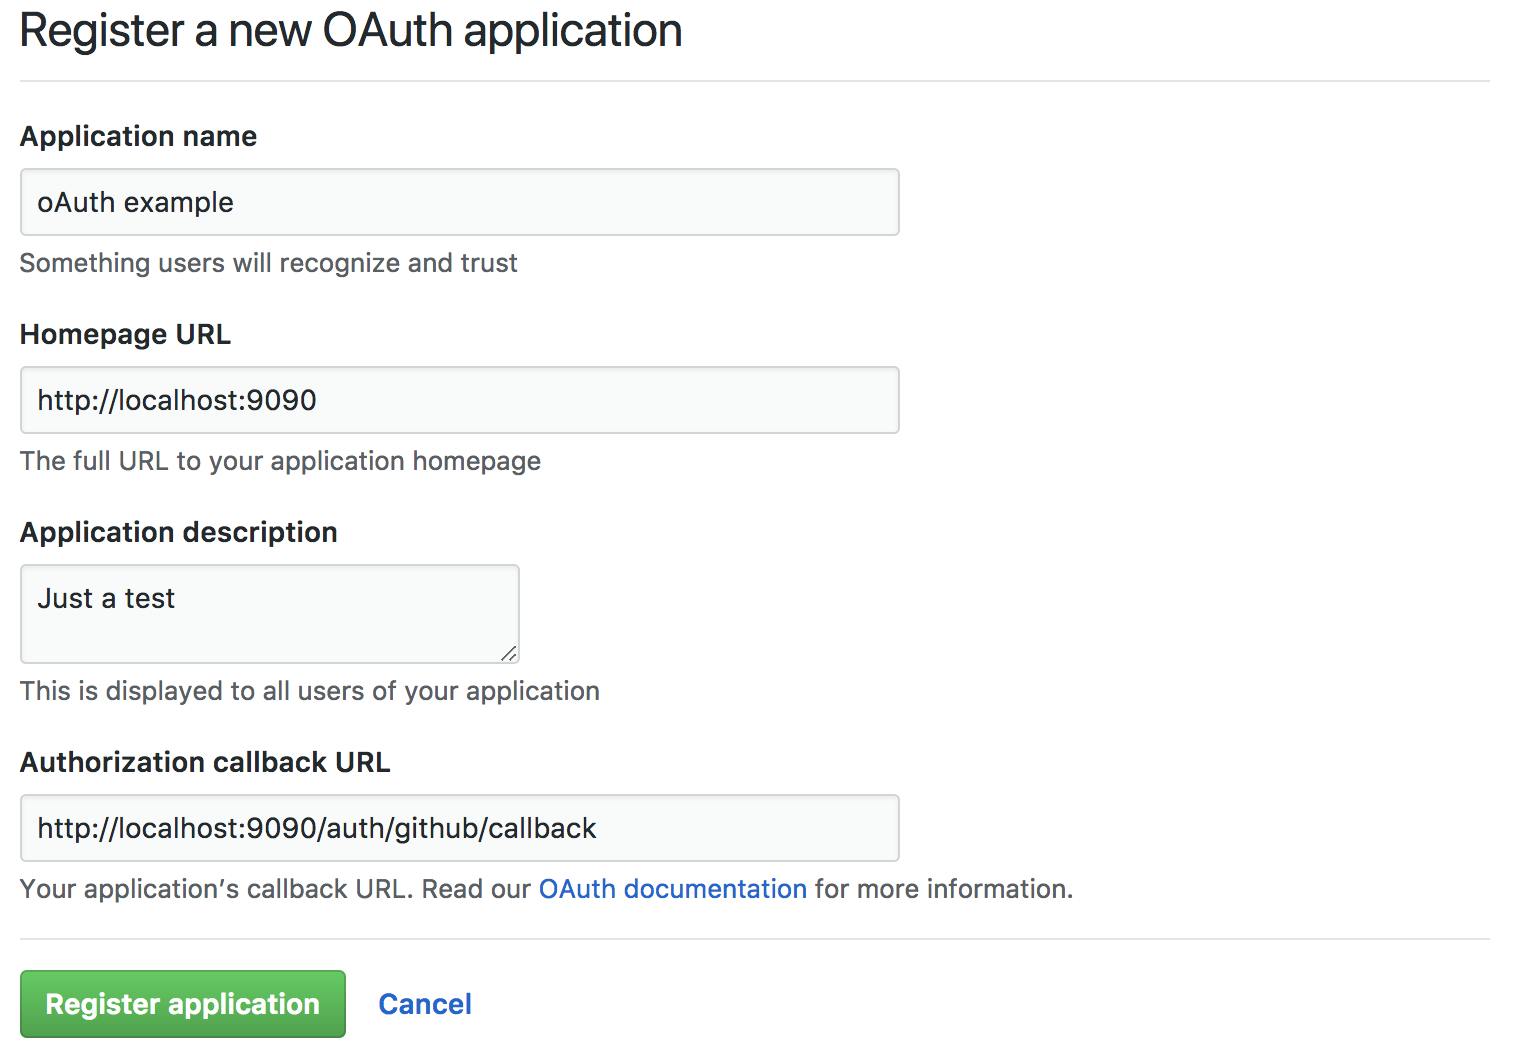
In the next step you'll Client ID and Client Secret, to populate our appSettings.
With our client information obtained, we are ready to write the code to redirect the user.
// Redirect user to social login
func redirectHandler(c *gin.Context) {
    // Define our settings
    appSettings := map[string]string{
        "clientID":     "xxxxxxxxxxxxxx",
        "clientSecret": "xxxxxxxxxxxxxxxxxxxxxxxxxxxxxxxxxxxxxxxxxx",
        "redirectURL":  "http://localhost:9090/auth/github/callback",
    }

    // Retrieve the URL
    authURL, err := gocial.New().
        Driver("github").
        Scopes([]string{"public_repo"}). // Specify custom scopes
        Redirect(
            appSettings["clientID"],
            appSettings["clientSecret"],
            appSettings["redirectURL"],
        )

    // Check for errors
    if err != nil {
        c.Writer.Write([]byte("Error: " + err.Error()))
        return
    }

    // Redirect to authURL with status 302
    c.Redirect(http.StatusFound, authURL)
}
We used Driver() method to specify our provider, in this case, Github, but you can use a lot of other social. Then, with Scopes(), we defined our custom scopes. In our case, we want access to its public repositories, but if you don't need custom privileges you can omit the function. Note that we didn't pass "user" scopes because Gocialite includes them by itself.
Finally, in the Redirect() function we pass our information and we retrieve our authURL.
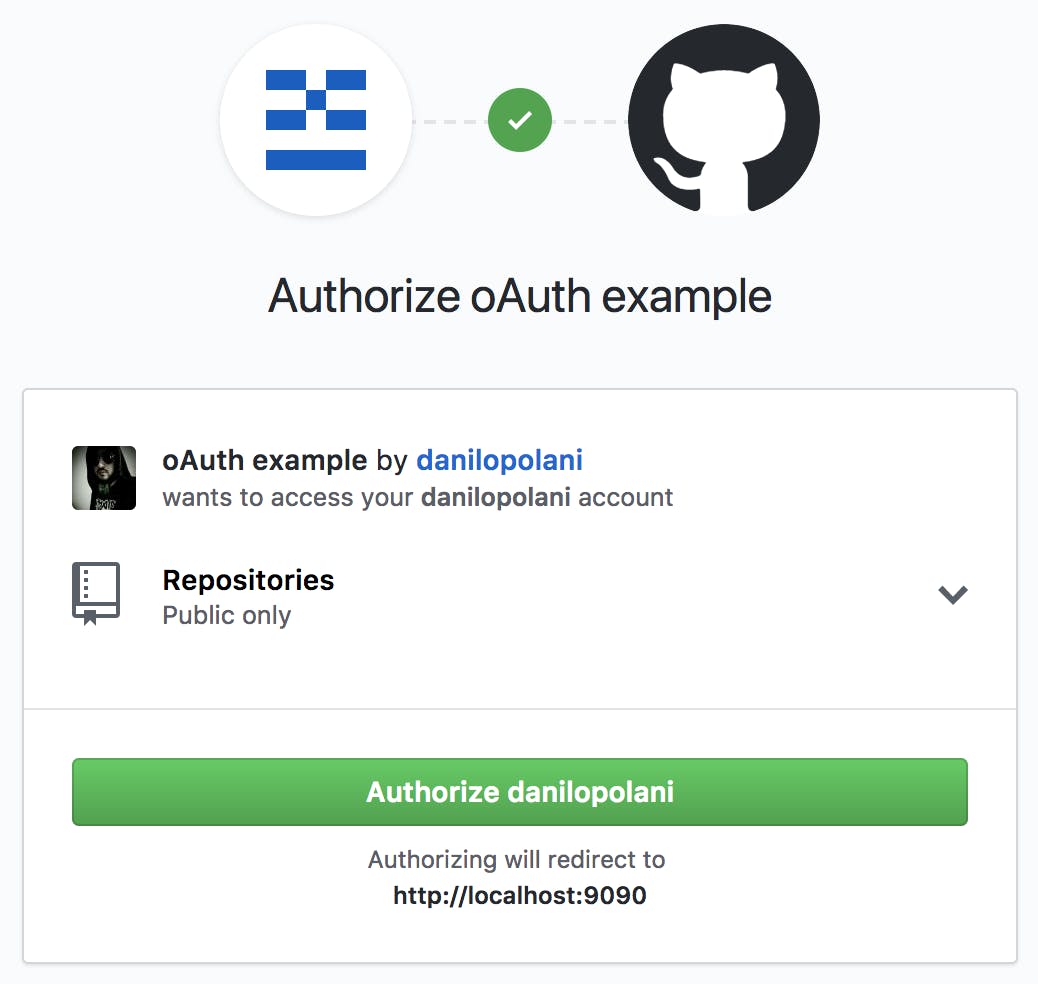
Before redirecting the user, we check for errors and then, with c.Redirect(), a Gin function, we send the user to GitHub login approval with status 302 (Temporary redirect) taken from the net/http package (click it to see all the available status). Remember to uncomment the "net/http" line in our imports!
Get user info
The last part of our flow is the callback to handle user information and we are going to write it in the callbackHandler function.
Here we have to pass to the Handle() method two values retrievable from the query string: state and code. State is a secret string that Gocialite passed in the beginning to the provider and now it checks if it's equal, in order to block CSRF attacks. Code is a string needed to start the exchange with the provider for user authentication.
It will return three variables: a user, a token and an error. If there's an error, the first two will be nil, otherwise the error will be nil.
func callbackHandler(c *gin.Context) {
    // Retrieve query params for state and code
    state := c.Query("state")
    code := c.Query("code")

    // Handle callback and check for errors
    user, token, err := gocial.Handle(state, code)
    if err != nil {
        c.Writer.Write([]byte("Error: " + err.Error()))
        return
    }

    // Print token information
    fmt.Printf("%#v", token)
    // Print in terminal user information
    fmt.Printf("%#v", user)

    // If no errors, show provider name
    c.Writer.Write([]byte("Hi, " + user.FullName))
}
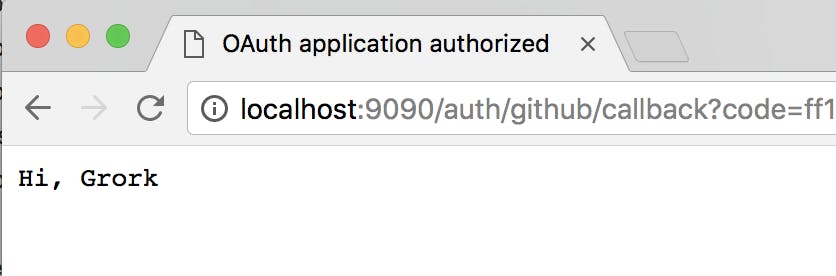
If everything went well, it will print in your browser "Hi, NAME", in my case "Hi, Grork".
We also use fmt.Printf with the %#v format to print in the terminal the full user and token content, but in production you should remove them.
The user variable will contain the main information of the current logged-in user:
ID
Username
FirstName
LastName
FullName
Email
Avatar
Raw
They will be all strings except for raw, which is a map of interfaces (map[string]interface{}) containing the original JSON returned by the provider. Note that all fields (except Raw) could be empty.
The token will be an oauth2.Token struct containing the following data:
AccessToken string
TokenType string
RefreshToken string
Expiry time.Time
If you want to set up a multi provider social login, here there is a full example.
If you like Gocialite, feel free to leave a star!